

Showing posts with label Wedding. Show all posts
Showing posts with label Wedding. Show all posts
Monday, January 16, 2012

Wednesday, January 04, 2012
Wedding DIY - Table Decor


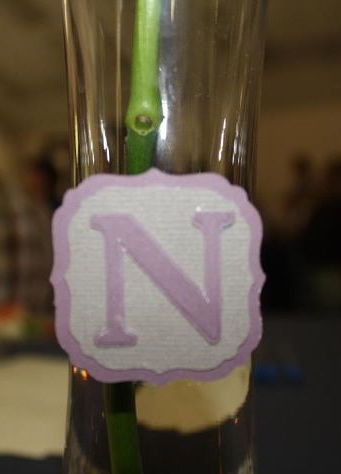


Hope these give you ideas. I didn't actually do any of these crafts myself, I had tons of help, so if I left out important info, feel free to comment with questions!
Tuesday, December 27, 2011
Wedding Stationary - Door Hangers
 Somehow in the midst of pre-wedding stress, I went crazy creating anything I could. Suddenly cute water bottles and snacks weren't enough for my hotel guests. I decided that they needed to be able to find each other in the hotel and it needed to be a cute creative way. I found ideas for door hangers and many of them were complicated! Instead, I created my own using the same linen paper I used for the programs and borrowed a circle cutter and round edge cutter from a craft friend. These are pretty basic tools, so if you don't have them, I'm sure any scrapbooking and/or craft making friend will let you borrow.
All I did was create two columns in a page. I lined up our wedding logo then typed the guests name below. Each column had one persons door hanger. I even made one for our bedroom as our honeymoon suite for the first night was our first night in our new house together.
1. Create 2 columns in your word document
2. Place logo toward the bottom of each column
3. Type guests name below logo (Mrs. & Mrs. So-and-So, or full names)
4. Either on word or by hand, mark an x a few inches below the top of the paper for the center of your hole.
5. Print on fancy paper - something with a decent weight like cardstock
6. Cut in half with paper cutter
7. Use a circle cutter to cut using the X as the center mark. You may want to test this on scrap paper first to be sure its the correct size. Mine cut a hole only about 1 inch in diameter
8. Cut an angle from the right edge to the circle (see picture above for an idea)
9. Trim corners with a curved edge trimmer if desired
10. Hang on door(s)
Sample of word document with names edited/smudged for privacy:

I used linen business paper. It has a heavier weight than regualr paper and is a little thinner than cardstock. Up close it looks like this:

Wedding Stationary - Water Bottles
For each of our out-of-town guests, we created a guest basket with some snacks, local maps and tourist info and a water bottle with our custom logo.
I really liked the pre-made waterbottle stickers I found at a craft store...but I was very disappointed! DO NOT BUY A WATER BOTTLE LABEL KIT. The labels were super-sticky and it was impossible to place them on a bottle without wrinkles, especially since almost all water bottles have some sort of ridges. I ended up using the FREE template they offered online and just printing them on regular printer paper. I cut them carefully to size and hid a piece of double stick tape at the end. For copyright sake, I'm not going to give you the company I got the template from b/c they want you to buy there sticky labels - but you can search for them online or even just set up your own template dividing a word document page into 4 equal parts. If you have more questions about how to do this, send me a comment.
1. Create an image in photoshop with your desired background (the purple for me) and wedding logo on top of it. Make sure to size it 8.25 inches wide and 2.5 inches tall - this may have to change a bit. Center the logo on the design.
2. Bring the picture into a word document and copy 4 of them (you can try to print 4 in photoshop, but that never works for me) Be sure to make the margins as small as your printer will allow you.
3. Print.
4. Trim each with a paper cutter. Keep in mind that depending on your printer may need to trim the top and bottom one a bit more to make sure the logo is still centered perfectly (only if your printer cut off some of the design)
5. Remove label from a bottle and replace with your label. Use double-stick tape to keep it in place.
The bottle label will last, even if in the fridge. It won't last if left in a hotel ice-bucket though...but I doubt the fancy labels would either :)
Here is what they turned out like. The picture is fuzzy, but they were perfect.


Wedding Stationary - Programs
 The instructions for the wedding stationary programs has been moved to my new blog. Click here for the full instructions. Sorry for any confusion.
Wedding Stationary - Mad Libs
The tutorial for the wedding stationary mad libs has been moved to my new blog at this website.
Sorry for any confusion- the new site was just much easier to organize for a high-traffic post!
Sorry for any confusion- the new site was just much easier to organize for a high-traffic post!

Wedding Stationary -Logo and Thank You Cards
One of the best decisions I made in my wedding planning was to create my own wedding stationary. It was easy to do, but took some planning. So I thought I'd share a little about how it was done so others may not have to struggle as much in the future.
I decided all paper stuff other than the invites would be produced by myself...not because I'm crazy crafty (I'm not good with crafts at all) but because it would save money and ensure that things matched. I also realized very early on that this was the only way we could get programs in time since we made final decisions on music and scripture a week before the wedding. I'm going to break this into a few posts just for ease of searching, but we created the following with a computer, paper, a printer and in some cases paper cutting stuff and tape.

 First up, the logo. We ordered invites from a company online as sim
Logo
Thank You Cards
Gift Tags for wedding party gifts
Mad Libs for reception entertainment
and more that I may or may not include :)
 First up, the logo. We ordered invites from a company online as sim
ple as we could find, but one unique thing we did was put an ~N~ at the top instead of both
our initials (eNc). We decided to carry this out through the wedding stationary. So, I opened up photoshop and found the shape I wanted, added a border using wedding colors for both (light pink and dark gray-ish purple). Then I added the wedding date on the bottom. It took a while to line it all up perfectly, but we had a logo. All the wedding day stuff had this logo.
We also used it to create thank you cards. We bought blank printable greeting cards at our local office store and used word to place the logo on the front of the cards only. We changed the wedding date to a simple "Thank You" and we had custom thank you cards at very little cost. They were very simple, but people loved them and they matched the rest of our wedding perfectly.
Subscribe to:
Posts (Atom)